📥 Receive
A receive order is what stock MTM's warehouses will be receiving. This page will guide you through the process of creating a receive order, adding items to the order and adjusting the quantities of each item.
Creating Receive Orders
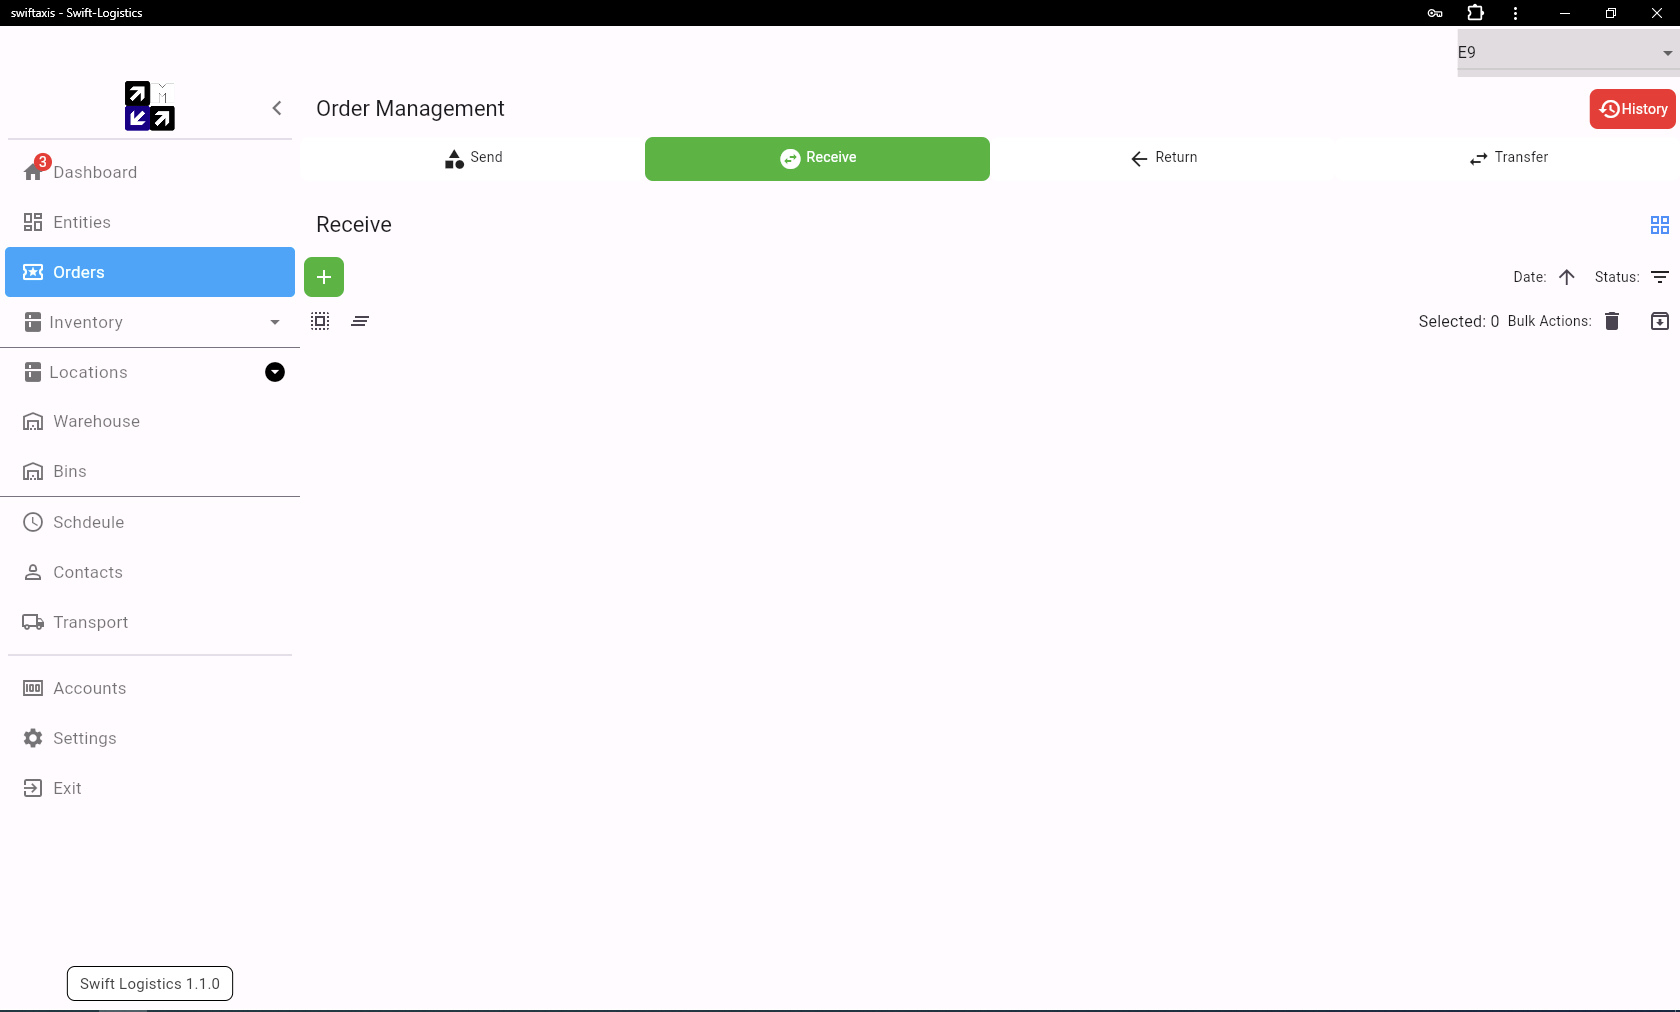
To navigate to the Order Management Page, start by clicking on "Orders" from the dropdown menu on the right side of the screen. This where you can access various functions related to order processing.
Create a new order by selecting the green plus icon, inputting supplier details, and selecting "New Purchase" to generate the order. Fill in the customer details or create a new one by clicking on the "Add Customer" button if necessary. Ensure to include the order reference number.
Once you're on the Order Management Page, locate the top row and select the "Receive" tab. This tab allows you to manage the receipt of incoming orders, enabling you to efficiently track and process orders.
Create Order
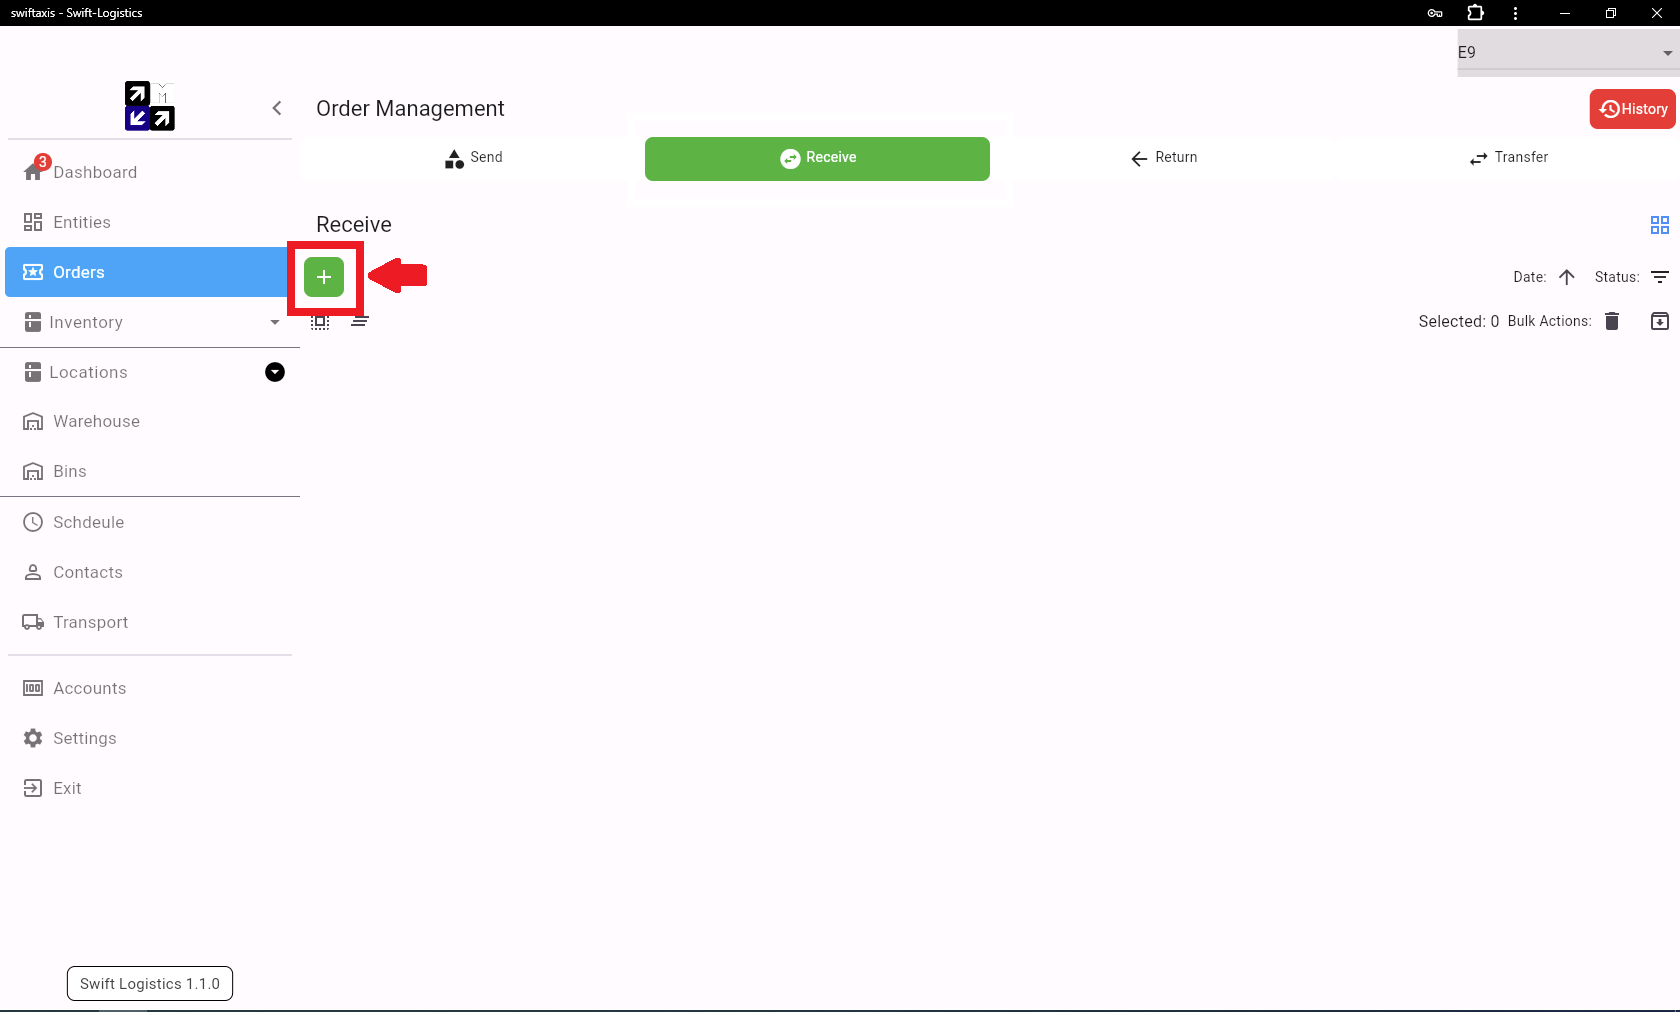
To create a new order, locate and select the green square icon with the white plus sign. This action will direct you to the New Receive page, where you can begin the process of generating a new order. From this page, you can input all the necessary details for the order, such as the customer, reference number and the warehouse the order will arrive to.
Add Order Details
On the New Receive page, start by filling in the order's supplier details and an appropriate reference number. This ensures accurate record-keeping and helps in tracking orders effectively. Once you've entered this information, select "New Purchase" to create the order. This action will also take you back to the Order Management page.
If the customer's details for the order are not available, you can easily add a new customer by pressing the add customer button, which will open the "Add New Customer" page. From there, you can input the necessary information to create a new customer profile, ensuring that all order-related details are accurately recorded for future reference and communication.

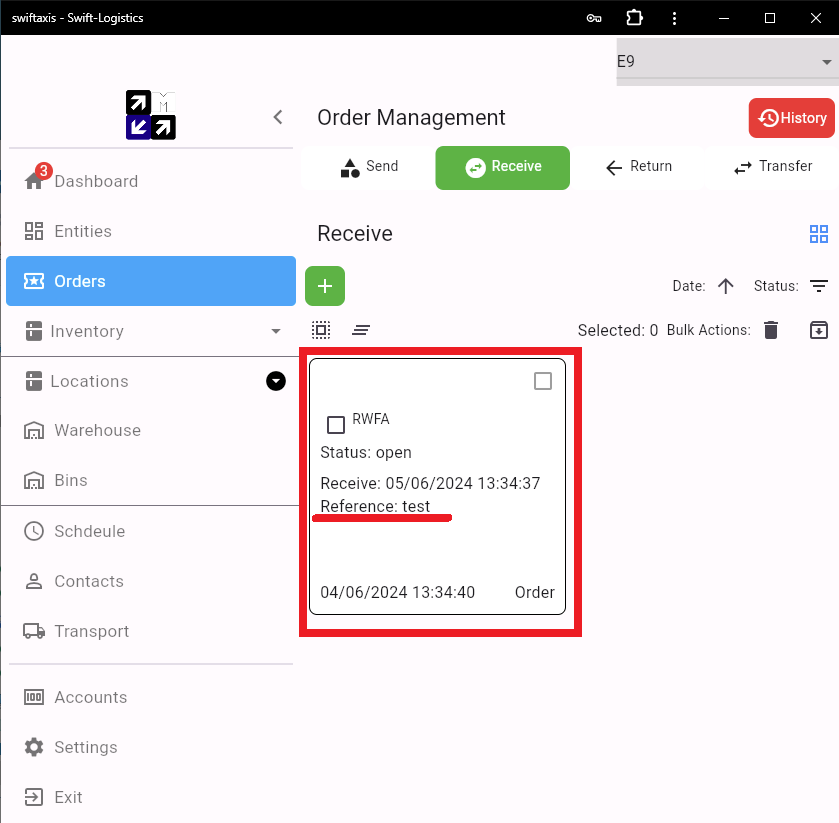
On the receive main page, the newly created order will be visible. Always double-check the reference to ensure you're selecting the correct order. This precaution helps prevent any errors and ensures that you're accurately managing and processing the intended order.
To add items to the order, simply click on the order you want to modify. This action will allow you to access the order details and proceed with adding the necessary items or making any required adjustments.
Adding Items to Receive orders
Adding items to the receive order represents the items MTM's warehouses ia receiving and should be check with the physical stock once it arrives.
Click the small edit button to open the Add Items page, where you can browse and select products. A green circle will indicate the selected items.
To specify quantities, press the green arrow to open a widget, showing the name and description of each item. Add the desired quantities and press "Save" to return to the order page.
After finishing, press the back arrow next to "Edit Order" to return to the order overview.
Add items to order
After an order is clicked, the Orders Management page will appear, providing a comprehensive overview of the selected items. This page allows users to review their current order details, make modifications, such as adding or removing items, and updating quantities.
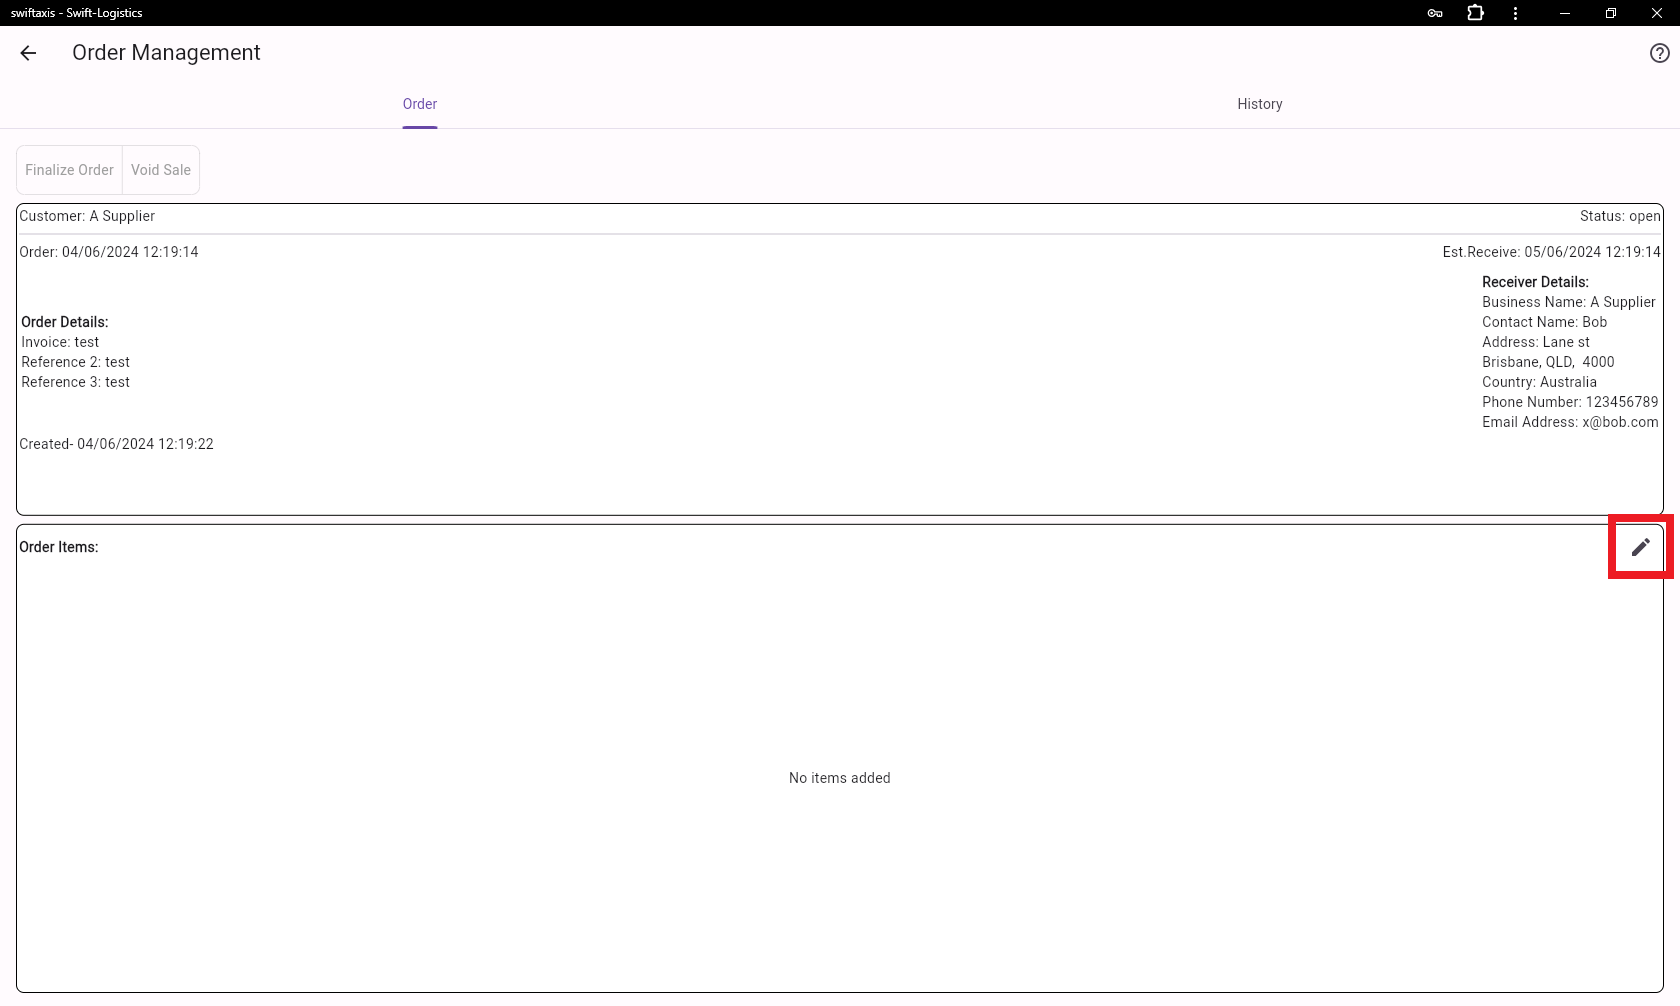
Click on the small edit button to open the "Add Items" page. On this page, you can browse through the available products or services and select the ones you'd like to include in your order.
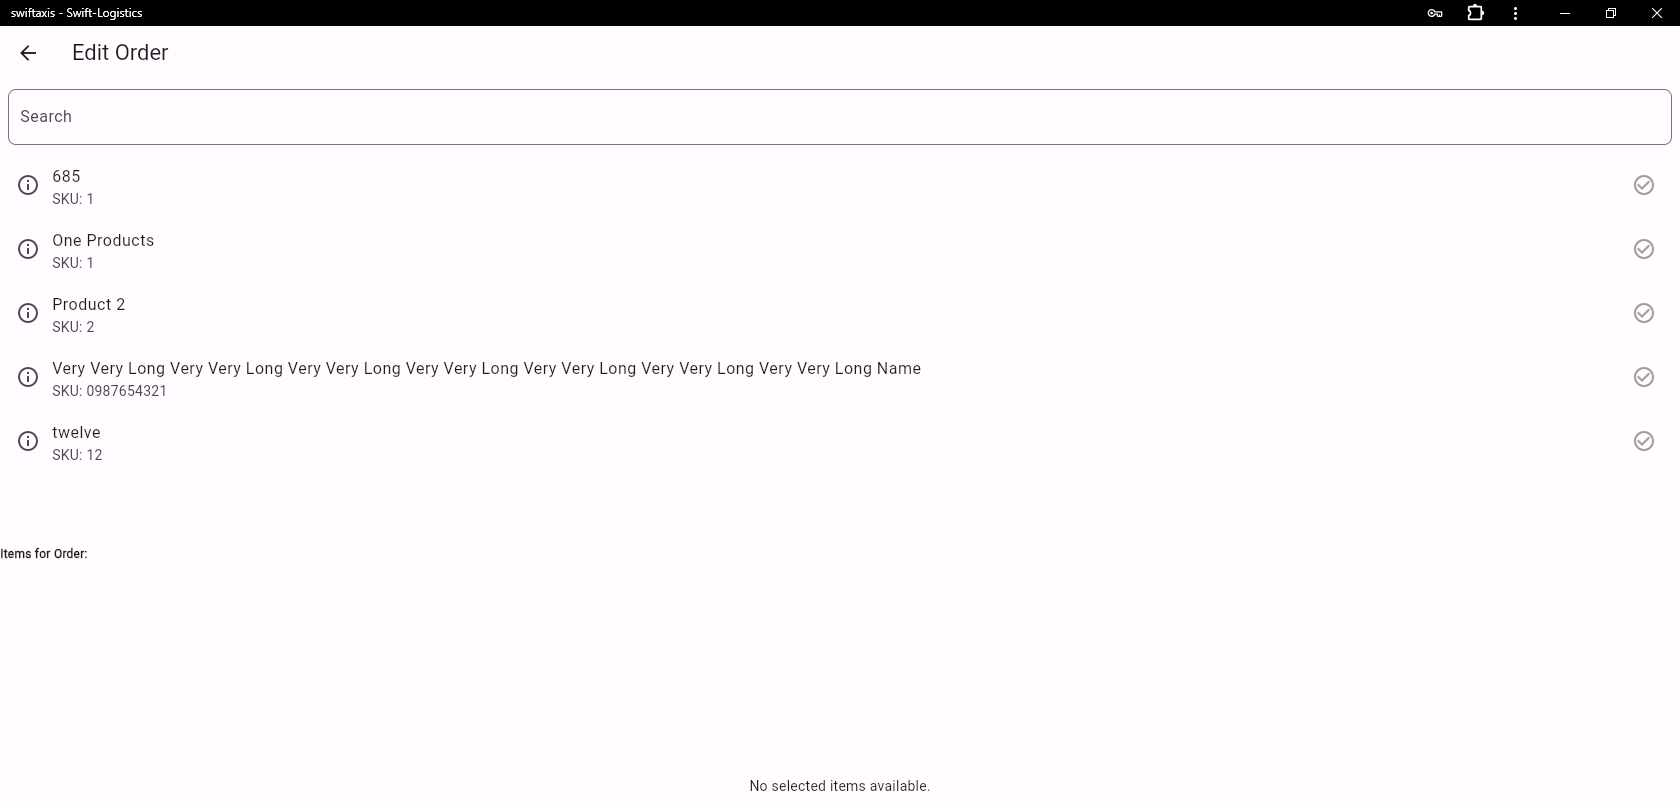
Item selection
Here, you can search for items in the order by typing in keywords or browsing through categories. Once you find the items you want, simply click on them to select. You'll notice that the circle next to the item turns green, indicating that it has been selected. This helps you keep track of your choices as you build your order.
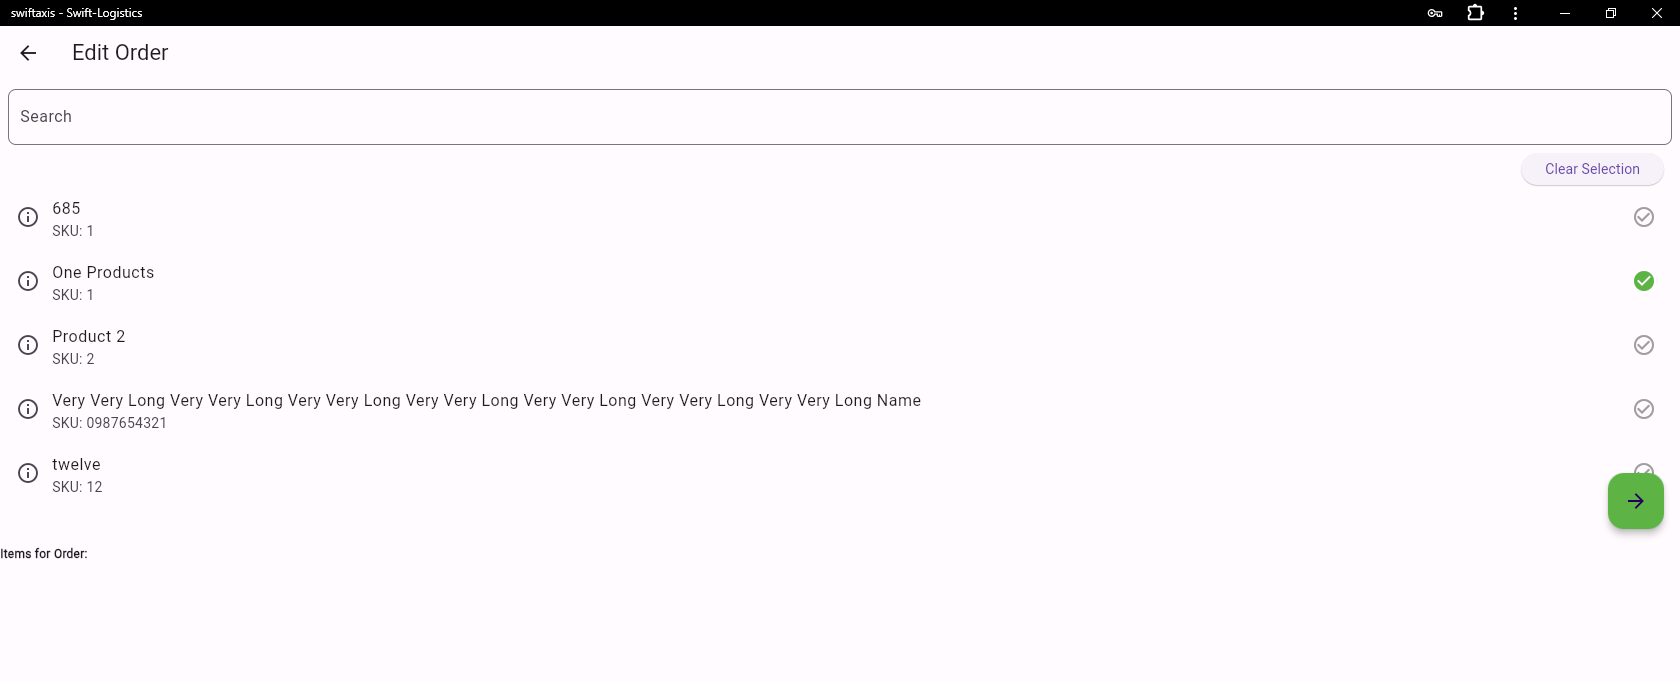
When you're ready to specify the quantity of the selected items, simply press the green arrow. This action will open a widget where you can easily add the desired quantities for each item in your order. You'll see the name and description of each selected item, aiding you in assigning the correct quantity. Reviewing this information ensures accuracy when specifying quantities for your order, helping prevent any confusion during the checkout process.
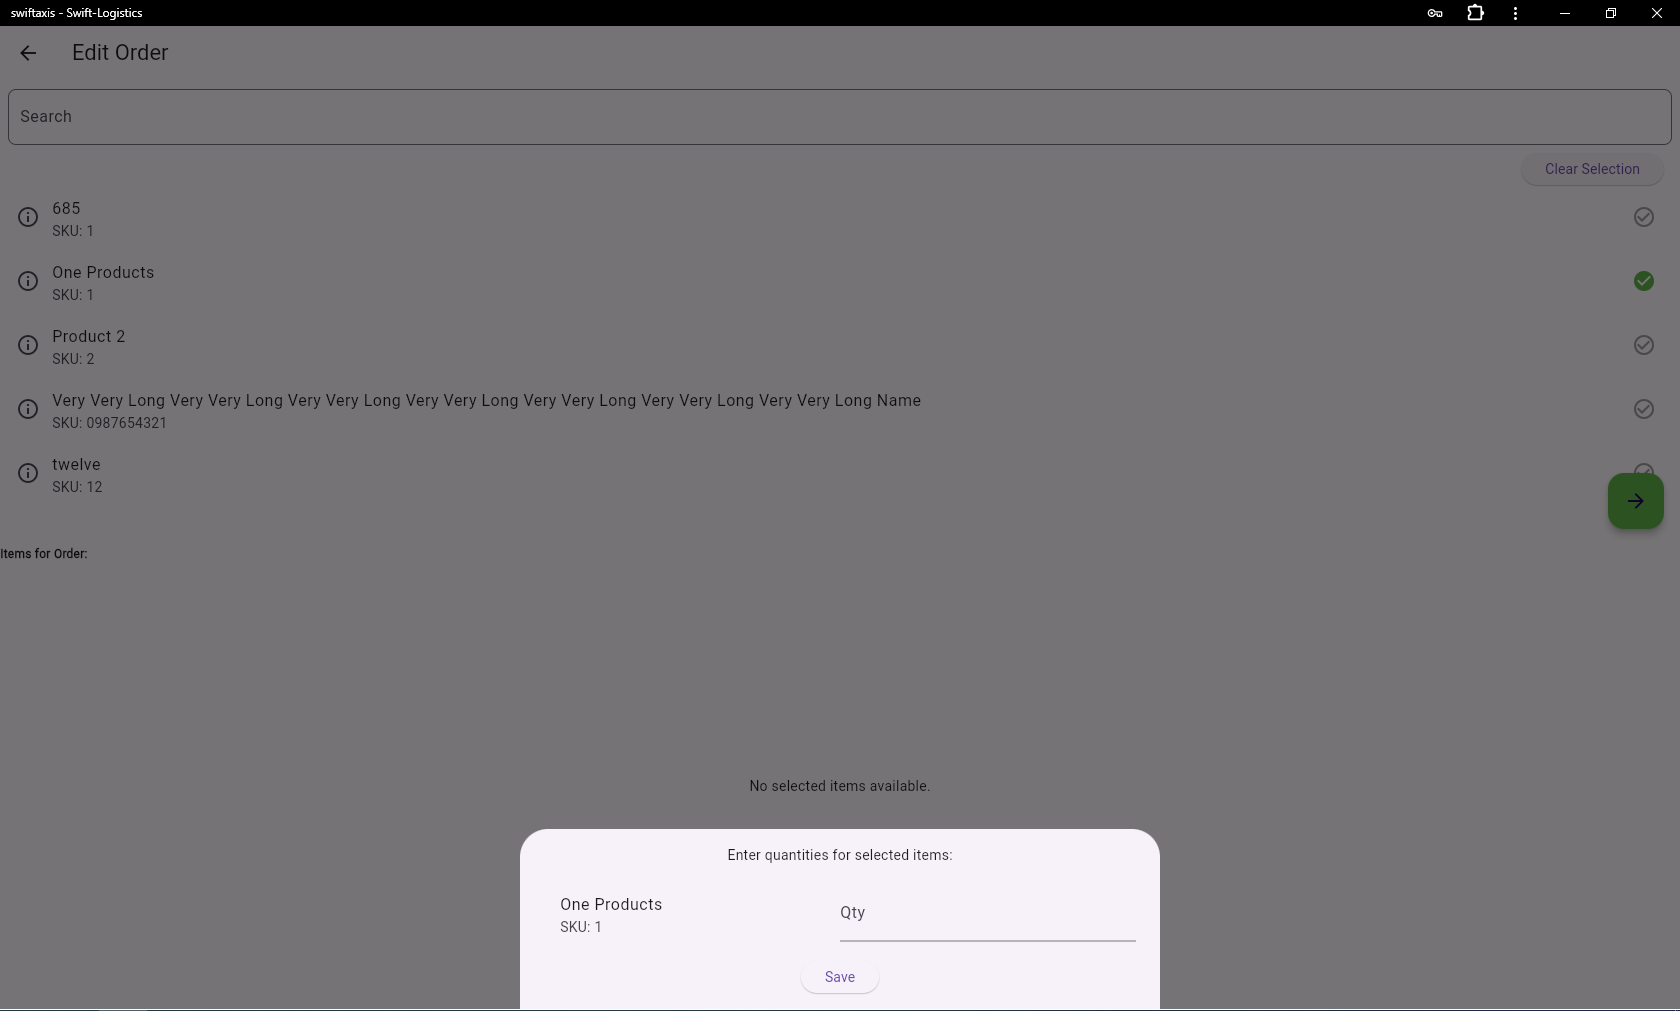
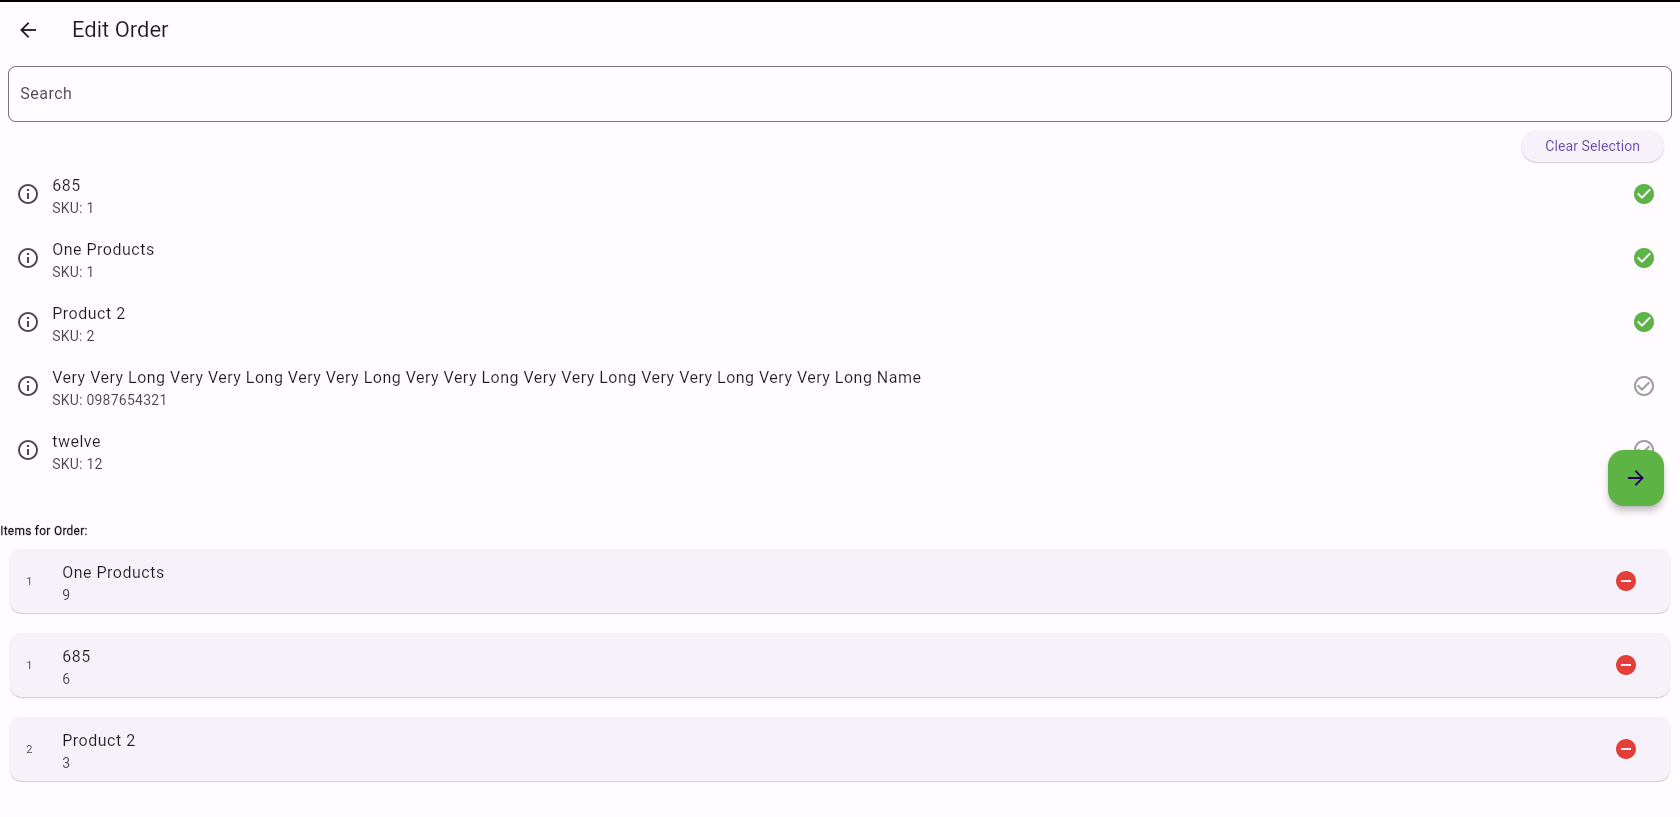
Once you've added quantities for all the items, simply press "Save". This action will return you to the order page, where you'll see the selected items and their quantities displayed at the bottom of the page.
Remove items
If you need to remove any item from the list, just click on the red circle next to it, and it will be removed instantly. This feature allows you to make adjustments to your order easily and efficiently.
If you need to add more items after specifying quantities, make sure to press the "Clear Selected" button before adding new items. This step is crucial to avoid adding previously selected items again, preventing duplication in your order. By clearing the selection, you ensure a clean slate for adding additional items without any confusion or duplication.
Once you've finished adding items and making any necessary adjustments, press the back arrow next to "Edit Order" to return to the order overview. From here, you can proceed to commit and fulfill the order. This allows you to review the order details one last time before finalizing the transaction, ensuring accuracy and completeness before proceeding with the fulfillment process.